



Step 1: Start Creating a New Course # #
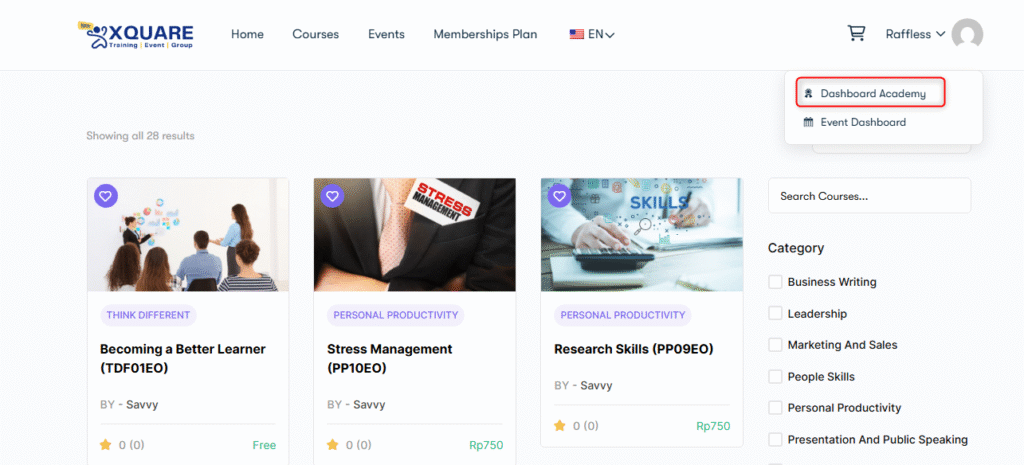
- Navigate to “Dashboard Academy” on user profile menu.
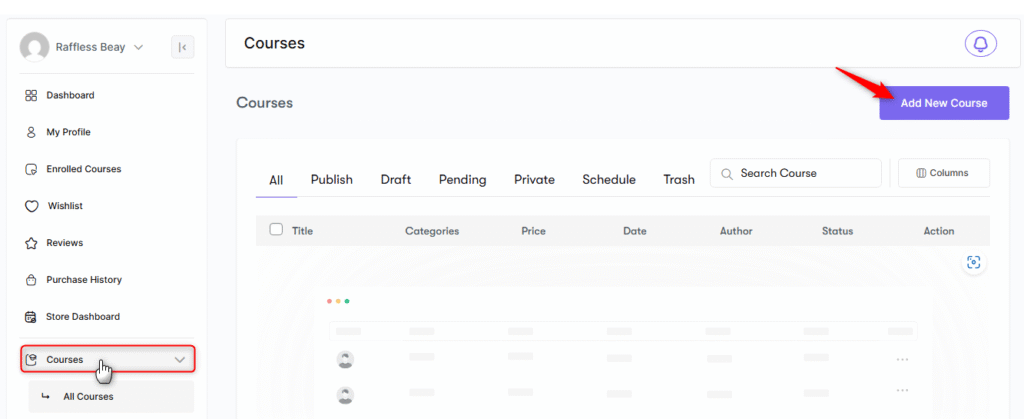
- In the left-hand menu, click on Courses to view your course management page.
- Click the Add New Course button to start creating a course.
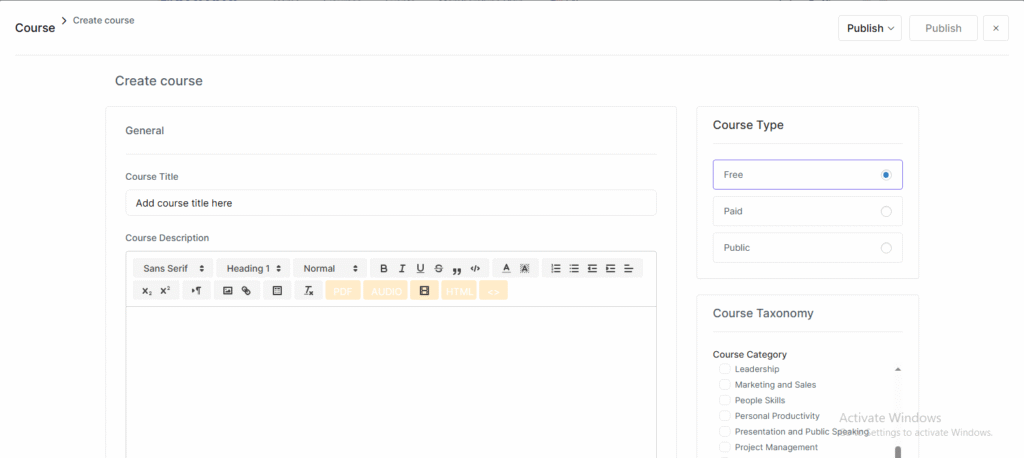
Enter a Course Title that clearly reflects the course content. Set the course status to Draft to save your work without publishing it yet. Click Save to move to the next step.
Step 2: Add Course Details # #
Now, you’ll provide information to help students understand what the course is about:
1. Write a detailed Course Description that explains:
- What students will learn.
- Who the course is for.
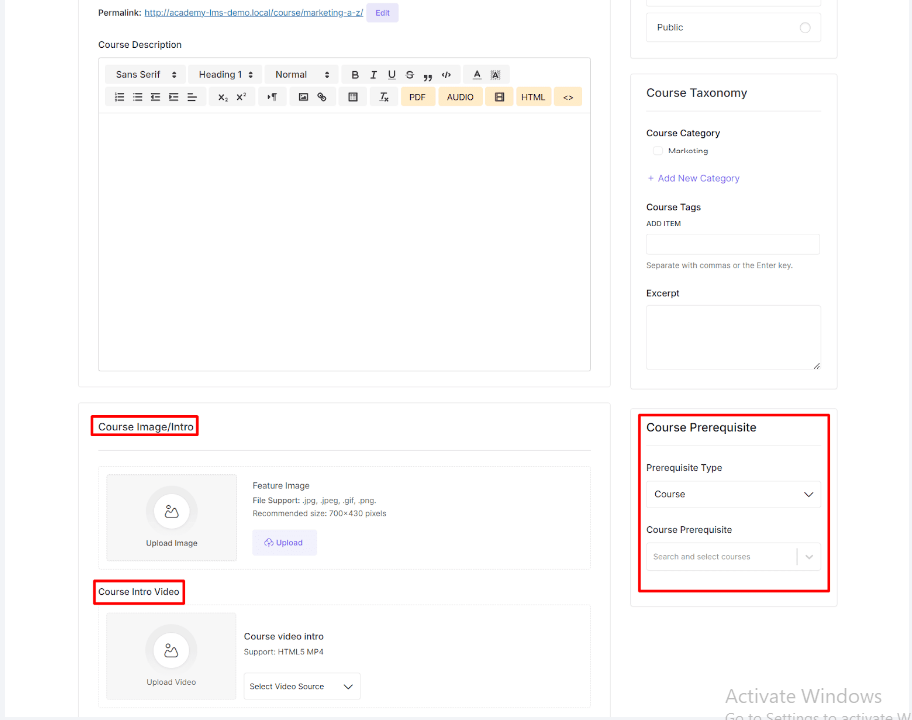
- Any prerequisites required to take the course.
2. Upload a Feature Image to represent your course visually. You can select one from your media library or upload a new image.
3. Add an Intro Video to give students a quick preview of the course. This video should be short, engaging, and highlight the value of your course.
Step 3: Configure Course Settings # #
Set up the course structure and learner experience by adjusting the following:
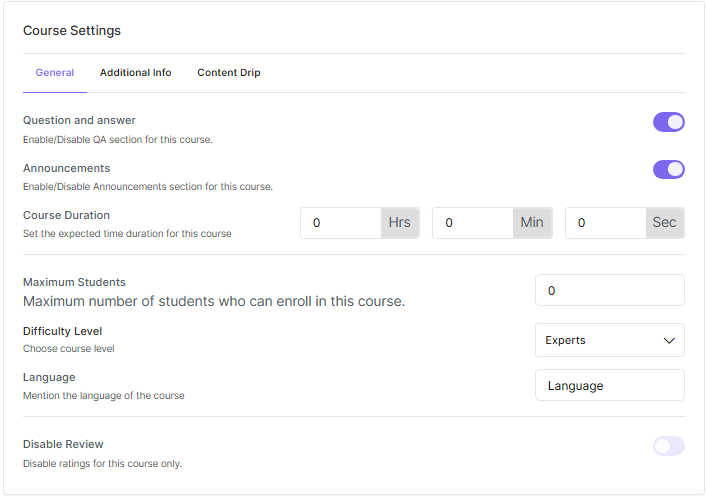
1. Go to General Settings and configure these options:
- Q&A Section: Enable this feature to let students ask questions during the course.
- Announcements: Turn this on to share updates or important information with students.
- Course Duration: Define the expected time needed to complete the course.
- Maximum Number of Students: Limit the number of enrollments if needed.
- Difficulty Level: Specify whether the course is for beginners, intermediate, or advanced learners.
- Course Language: Select the language in which the course content is delivered.
- Disable Review: Disabling reviews is useful if you want to keep feedback private or focus solely on delivering course content without public ratings.
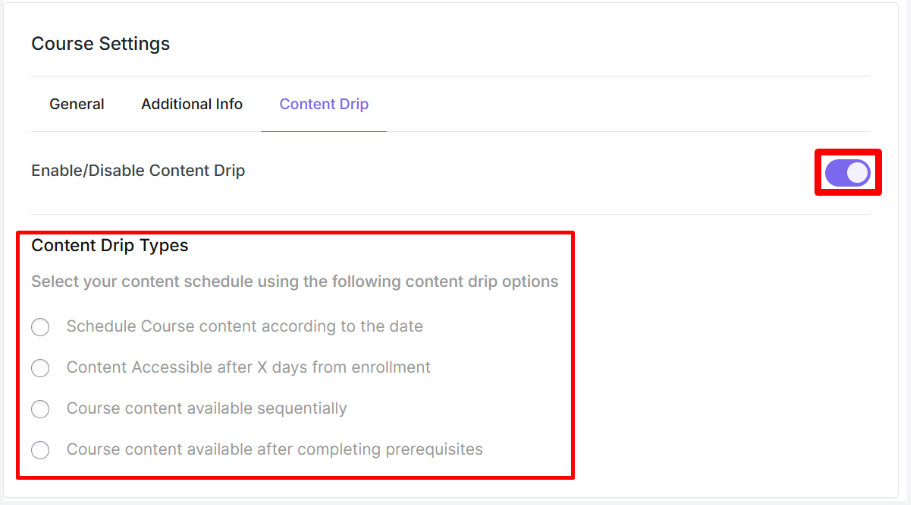
If you want to release course content gradually, enable the Content Drip option. This allows you to schedule when specific lessons or modules become available to students.
Step 4: Build the Course Curriculum #
Create the structure of your course by adding lessons, quizzes, and other content:
1. Open the Course Builder section.
2. Click Add New Curriculum to start building your course.
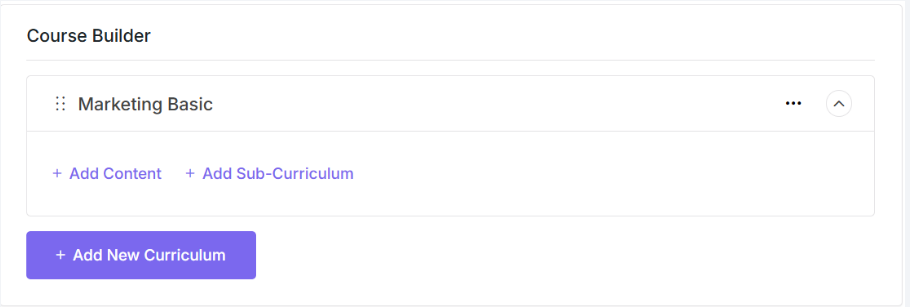
3. Use the Add Content option to add:
- Lessons: Provide video lectures, slides, or other instructional materials.
- Quizzes: Test students’ understanding with interactive quizzes.
- Assignments: Assign tasks or projects for students to complete.
- Meetings: Schedule live classes or discussions.
- Tutor Bookings: Allow students to book one-on-one sessions with you.
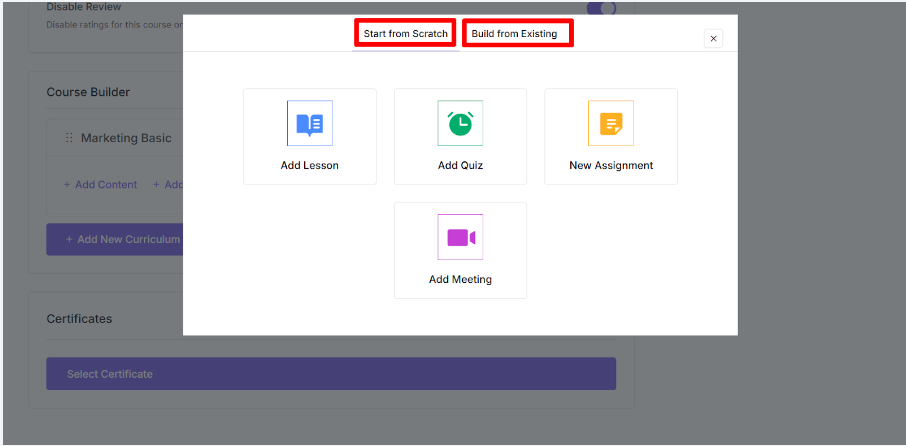
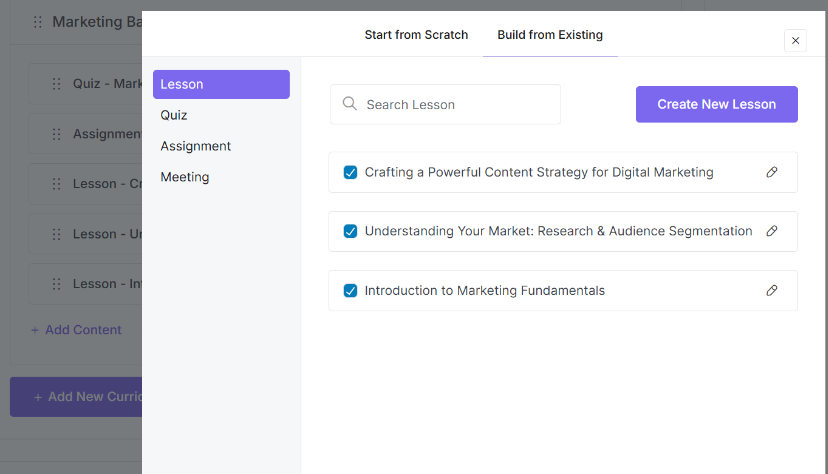
4. If you already have existing content, click Build From Existing to reuse it in the new course.
Step 5: Add Lessons #
Lessons are the core of your course. Here’s how to add one:
Click Lesson in the curriculum builder. Enter a Lesson Title that clearly describes the topic. Write a Lesson Description explaining what the lesson covers.
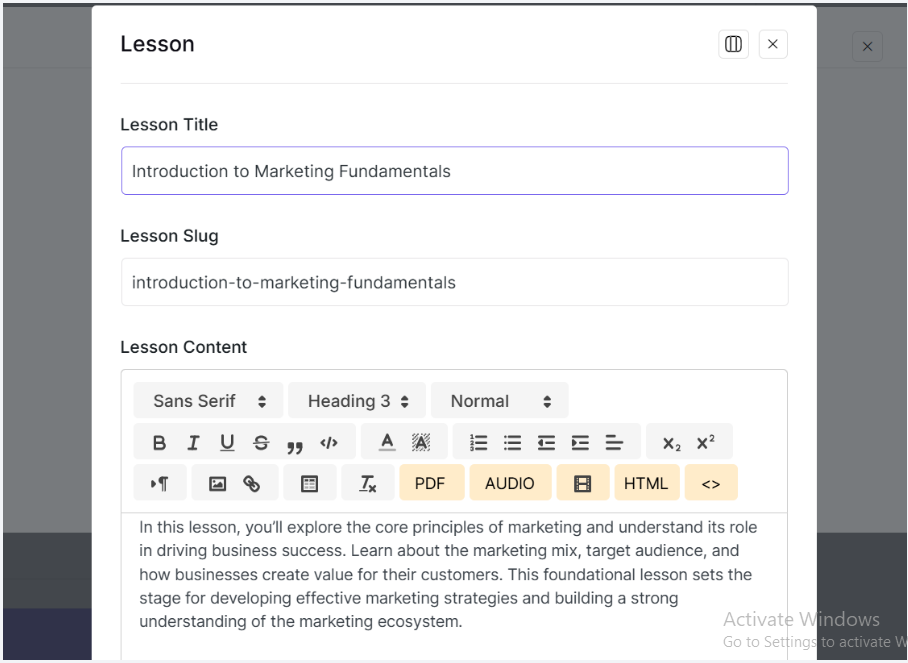
Optionally, upload a Feature Image for the lesson. Enable the Preview Lesson option if you want this lesson to be visible to prospective students before they enroll. Choose a Video Source (e.g., upload a file or link from an external platform like YouTube).
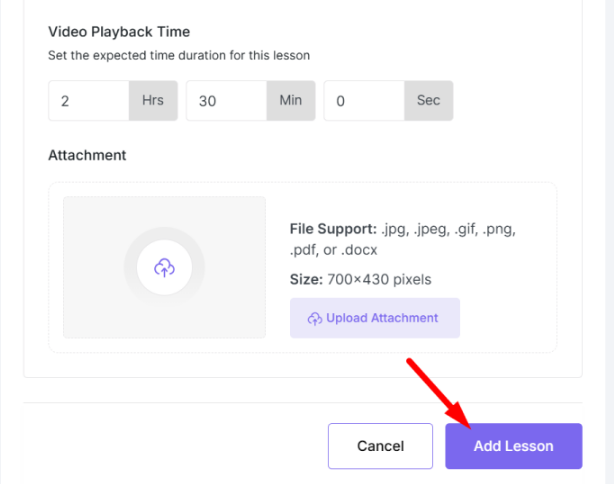
Add your lesson video and set the Video Playback Time. Upload any additional resources, such as slides, PDFs, or worksheets, as attachments. Click Add Lesson to save it. Repeat this process for all lessons in your course.
Organize the Curriculum #
- Use the drag-and-drop feature to reorder lessons, quizzes, and other content in the curriculum.
- To add more content, click Add Content and repeat the steps as needed.
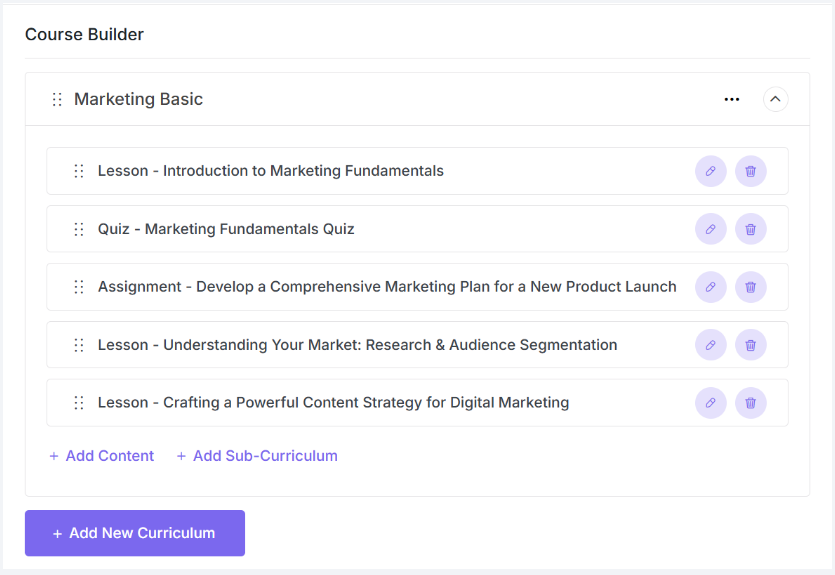
To reuse previously created lessons or other content, select Build from Existing after choosing Add Content from Course Builder.
Step 6: Manage Your Course #
Once your course is live, you can manage and update it anytime. From the front-end dashboard, you can:
- Track enrollments and student progress.
- Access and respond to questions in the Q&A section.
- Update lessons, quizzes, and assignments as needed.
- Post announcements to keep students informed.
- Monitor reviews and feedback from students.


