



1. Visit yay.xquare.net
Go to https://yay.xquare.ofiz.cloud and log in using your account.
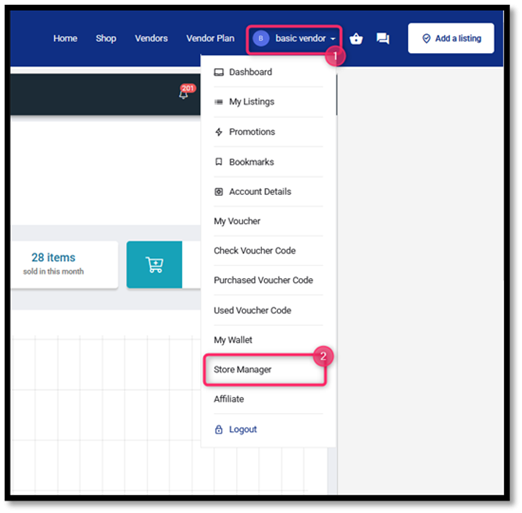
2. Access the Store Manager Menu
Once logged in, open the “Account Profile” menu and select “Store Manager.”
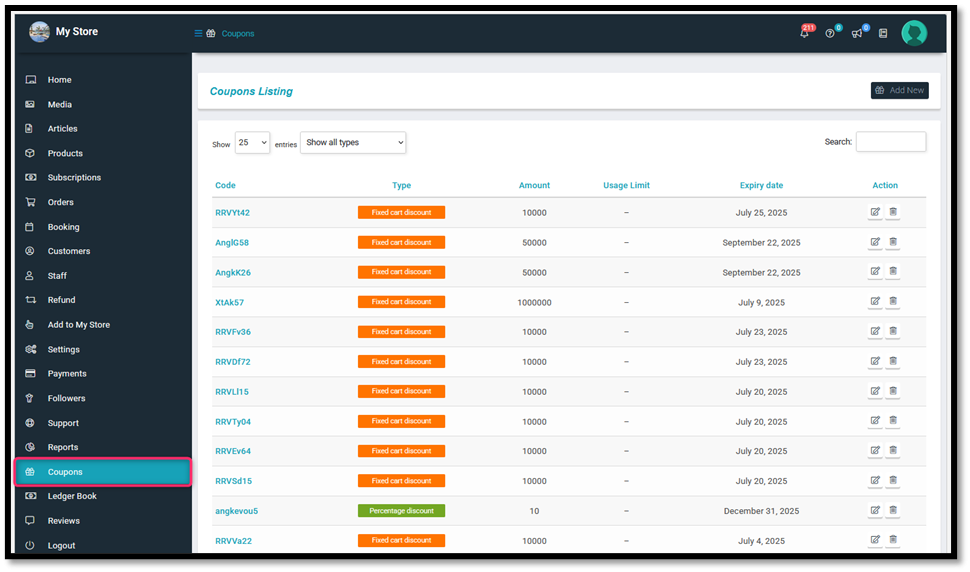
3. Access the Menu
On the Store Manager dashboard, go to the “Coupon” menu to manage your product listings.
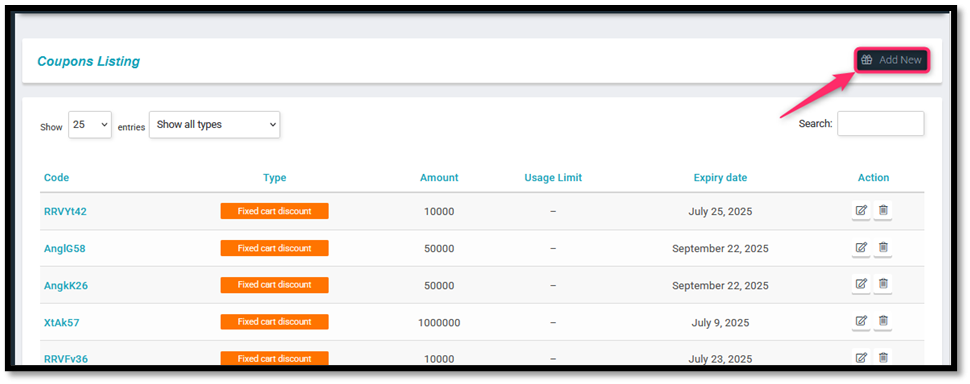
4. Add a New Coupon
Click “Add New” to start creating a new coupon.
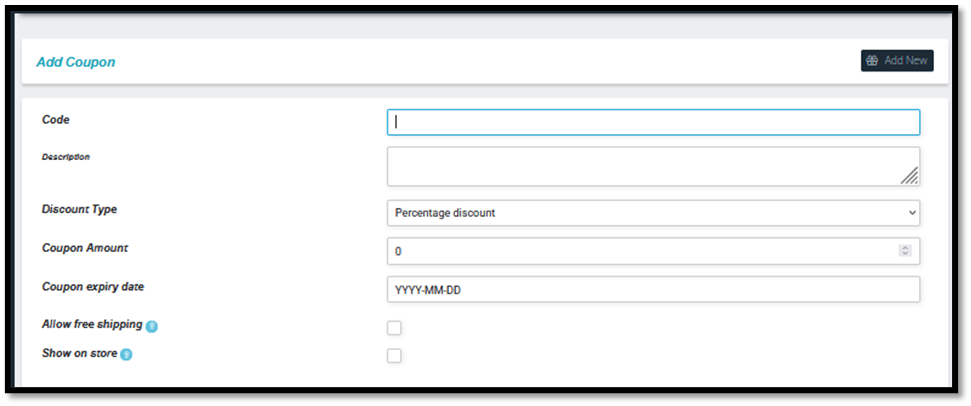
5. Fill in Coupon Details
Code: Enter the coupon code (e.g., DISKON10).
Description (optional): Write a short description (e.g., “10% off all products”).
Discount Type: Choose the type of discount:
- Percentage discount → discount in percentage (e.g., 10%).
- Fixed product discount → fixed amount off per product.
Coupon Amount: Enter the discount value based on the selected type (e.g., 10 for 10%).
Coupon Expiry Date: Set the expiration date (format: YYYY-MM-DD).
Allow Free Shipping: Check this box if the coupon includes free shipping.
Show on Store: Check this box if you want the coupon to be visible to customers.
6. Set Restrictions
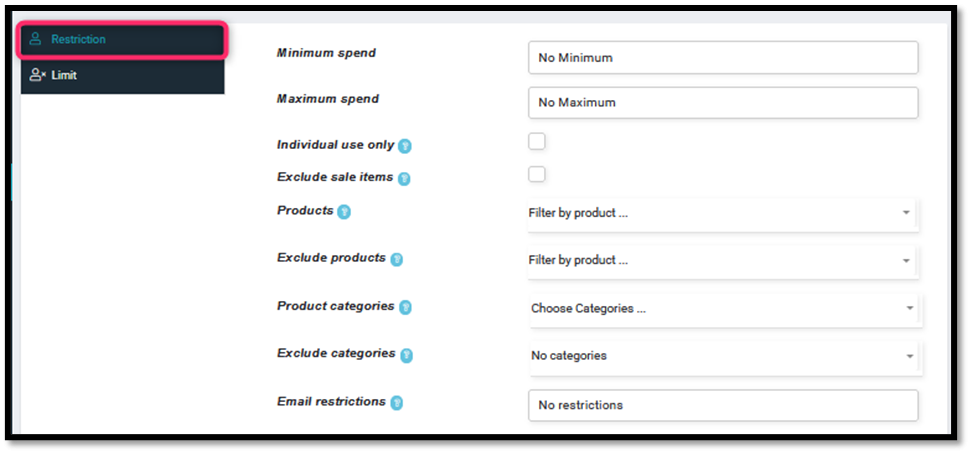
Click the “Restriction” tab to set usage limitations:
- Minimum Spend / Maximum Spend: Define the minimum or maximum order total for the coupon to be valid.
- Individual Use Only: Check this box to prevent combining with other coupons.
- Exclude Sale Items: Check this box to exclude discounted products.
- Products / Exclude Products: Select specific products to include or exclude.
- Product Categories / Exclude Categories: Choose applicable product categories.
- Email Restrictions: Limit coupon usage to specific email addresses.
6. Set Usage Limits
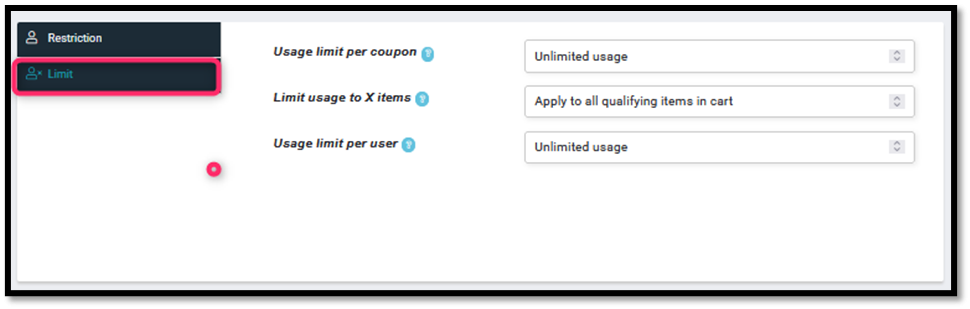
Click the “Limit” tab:
- Usage Limit per Coupon: Total number of times the coupon can be used.
- Limit Usage to X Items: Restrict coupon usage to a specific number of items.
- Usage Limit per User: Limit how many times each user can use the coupon.
8. Submit
Click the “Submit” button to save and activate your coupon.


