



Go to https://yay.xquare.ofiz.cloud and log in using your account credentials.
2. Access the Store Manager Menu
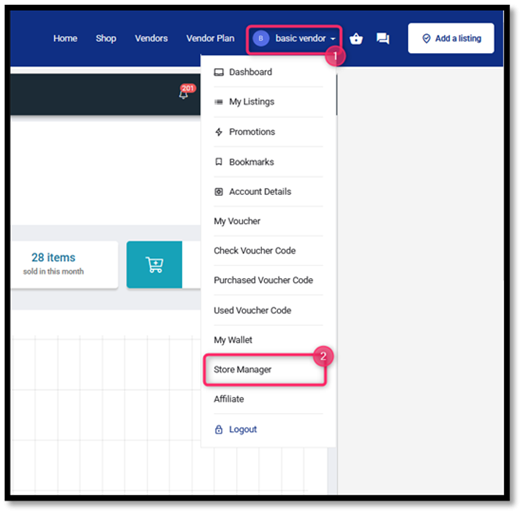
Once logged in, open the “Account Profile” menu and select “Store Manager”.
3. Open the “Settings” Menu.
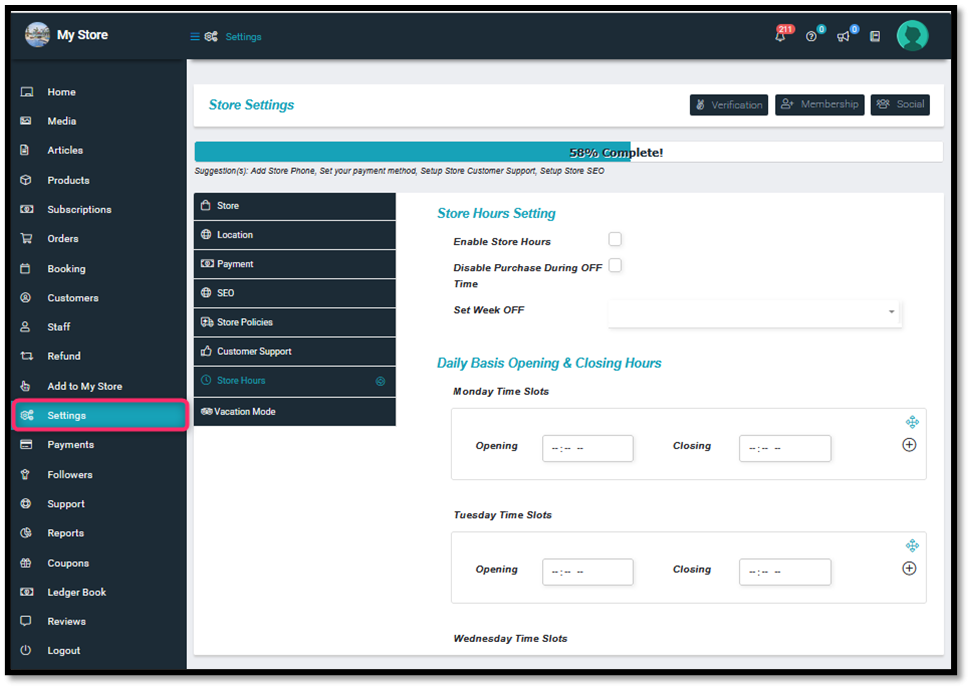
On the Store Manager dashboard, click on the “Settings” menu (gear icon) located on the left-hand panel.
4. Select the “Store Policies” Submenu“
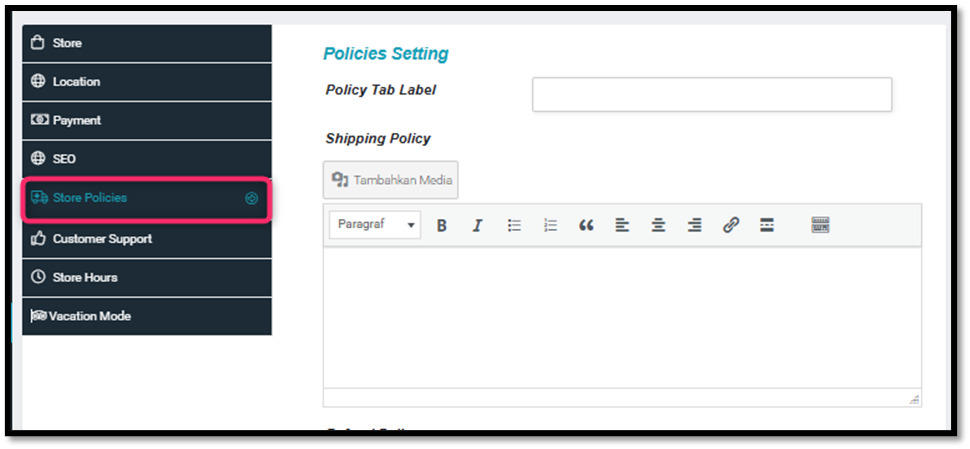
Within the Settings page, click on the “Store Policies” submenu to access the store policy configuration page.
5. Enter the Policy Tab Label
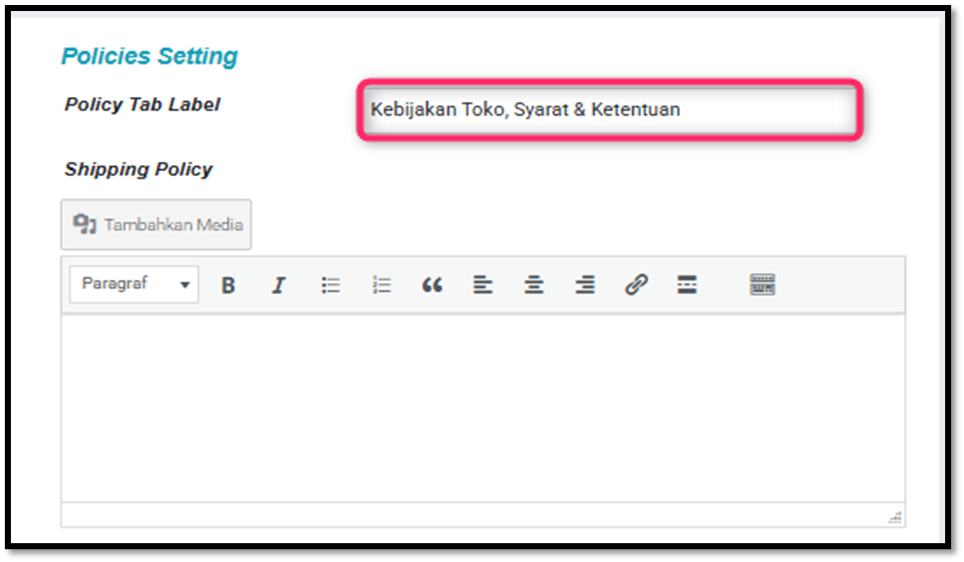
Provide a name for the tab that will display your store policies (e.g., “Store Policy,” “Terms & Conditions,” etc.).
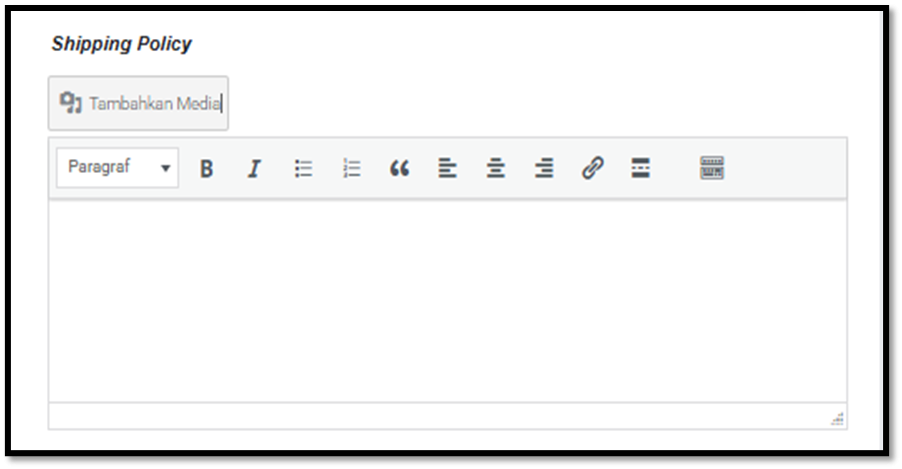
6. Write the Shipping Policy
In the Shipping Policy section, outline the rules related to product delivery, such as delivery timeframe, shipping fees, and service coverage areas.
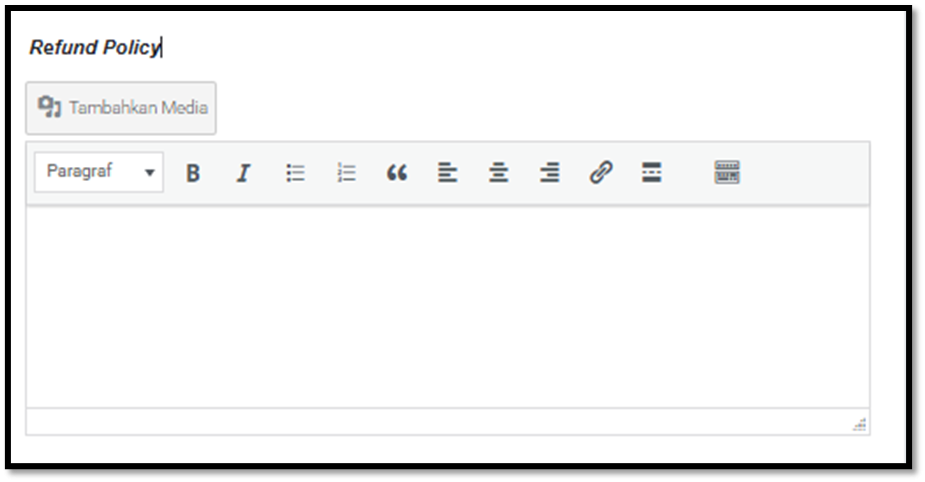
7. Write the Refund Policy
In the Refund Policy section, specify the conditions and procedures for refunds—for instance, when a refund can be requested and how long the process will take.
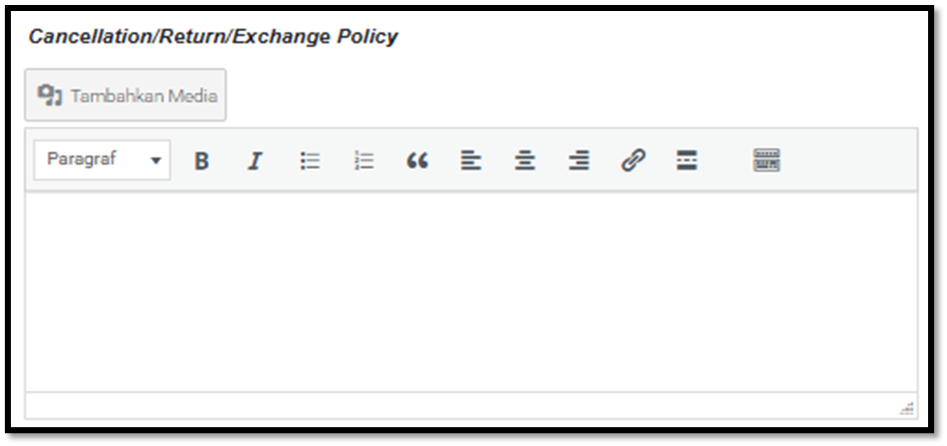
8. Write the Cancellation, Return, and Exchange Policy
Describe the terms and conditions for order cancellations, product returns, or exchanges. Include applicable deadlines and qualifying criteria. Use the “Add Media” button if you wish to insert images, documents, or supporting files for each policy.
9. Save the Settings
Once all information is correctly filled out, make sure to save your changes so the policies will be displayed on your store page.


