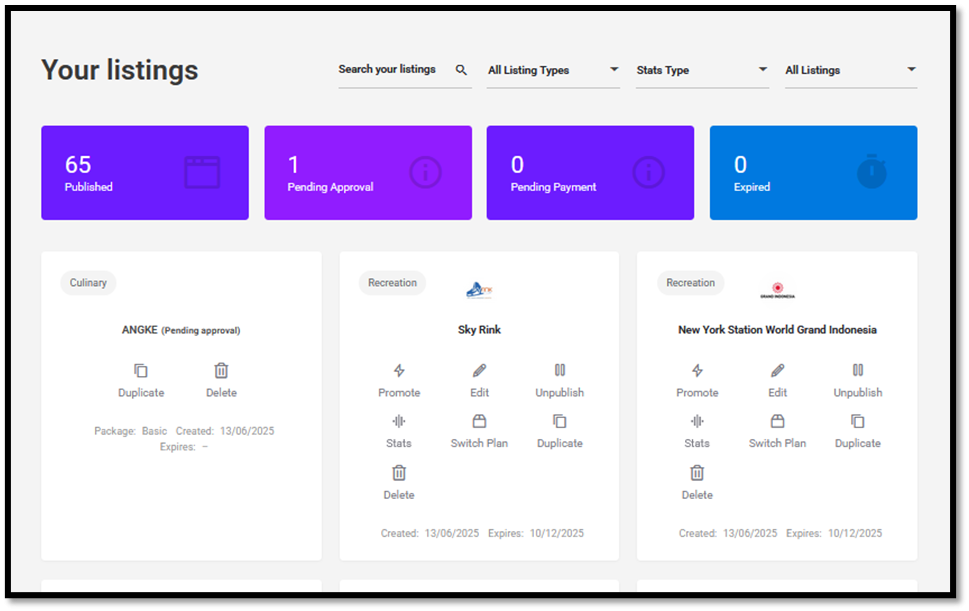



1. Visit Xquare.net
Go to https://yay.xquare.ofiz.cloud and log in using your account.
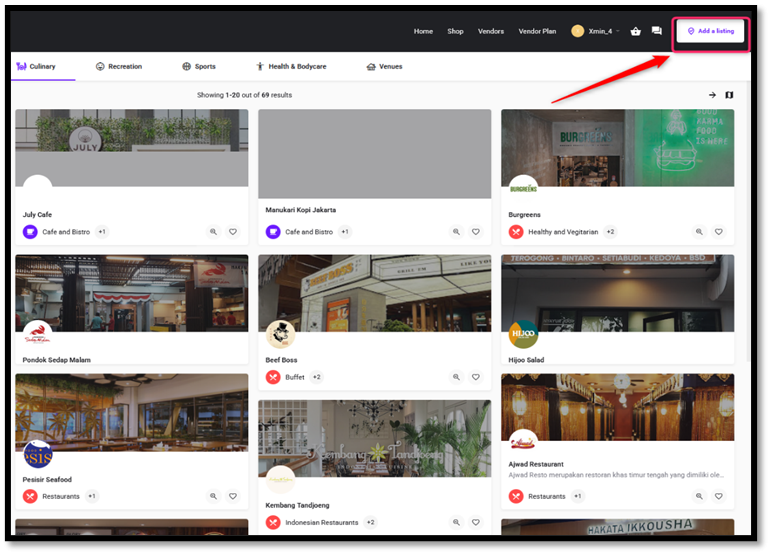
2. Select “Add a Listing”
Once logged in, click on the “Add a Listing” button located at the top right corner of the homepage.
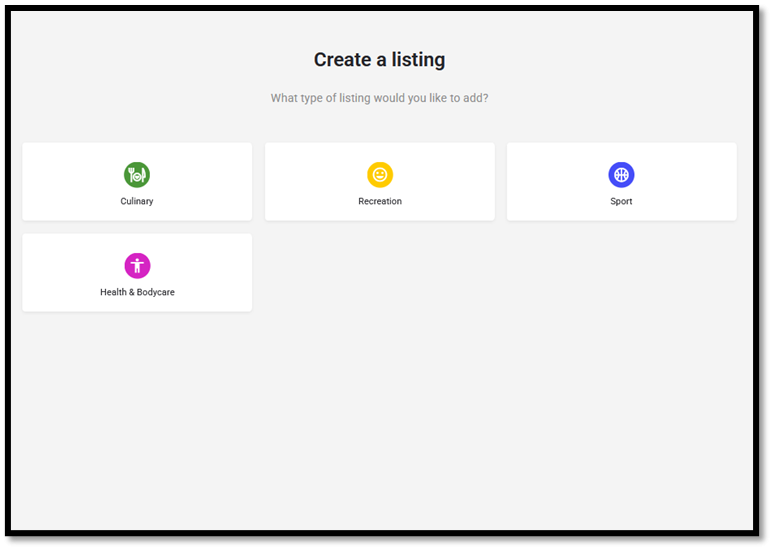
3. Choose the Appropriate Category
On the “Create a Listing” page, select the category that best fits the nature of your listing.
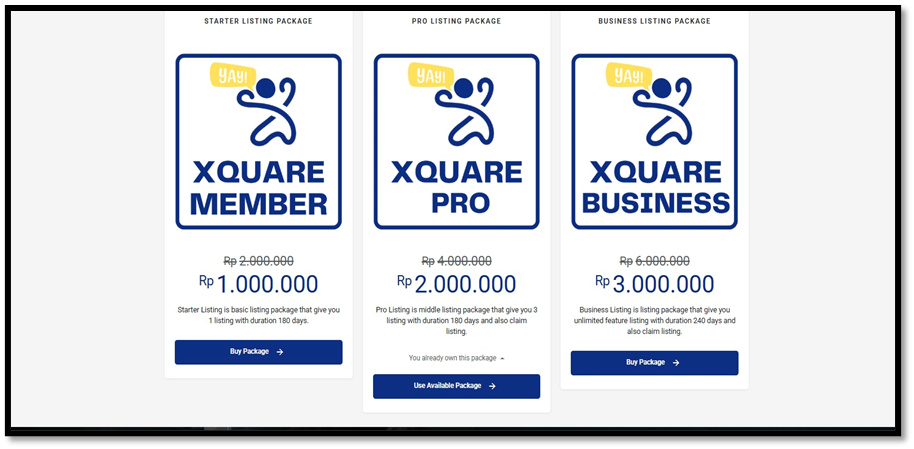
4. Select a Listing Package
Choose a listing package that suits your needs and preferences.
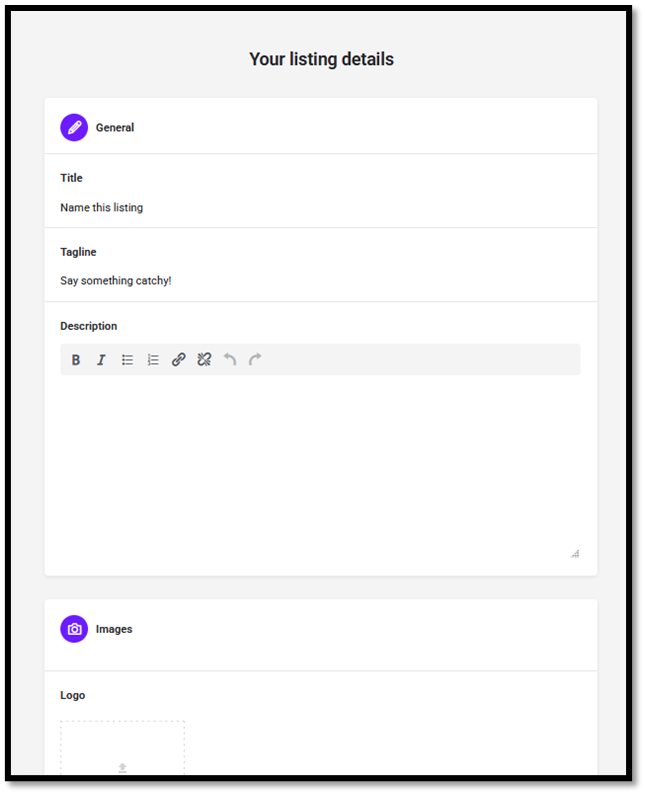
5. Complete the Listing Form
Fill out the form with detailed and accurate information about your listing. Ensure all required fields are completed to provide a comprehensive representation of your business or service. The required information includes:
- Title: The main title of your listing.
- Tagline: A short slogan highlighting the unique value or key feature of your listing.
- Description: A complete and informative description of the product or service you offer.Images: Upload relevant visuals such as:
- Logo
- Cover Image
- Gallery Images
- Contact Information: Provide accurate contact details, including email address, phone number, or WhatsApp.
- Social Networks: Add links to your official social media accounts (if available).
- Work Hours: Specify your business operating hours.
- Timezone: Choose the appropriate time zone based on your business location.Location: Enter your complete business address.
- Region: Select the relevant administrative region.
- Category: Choose the most relevant category for your listing.
- Tags: Add relevant keywords that describe your product or service.
- Price Range: The price range you set for your listing.
- Product/Description: Provide a brief yet informative description of your key products or services.
6. Submit Your Listing
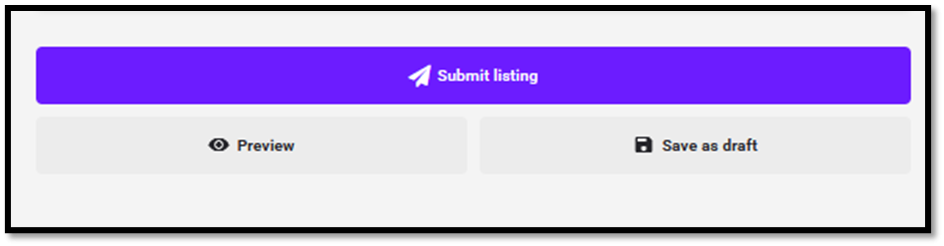
Once all information has been filled in, you will see three buttons at the bottom of the page:
- Submit Listing (purple button): Click this to submit your listing for review and processing by the Xquare team.Preview: Use this button to review your listing before submission and ensure all information is correct.
- Save as Draft: If you’re not ready to submit, click this to save your listing as a draft and complete it later.
Please review all entered information carefully before clicking “Submit Listing” to ensure nothing is missing or incorrect.
7. Proceed with Payment
After submitting your listing, follow the provided instructions to complete the payment.process.
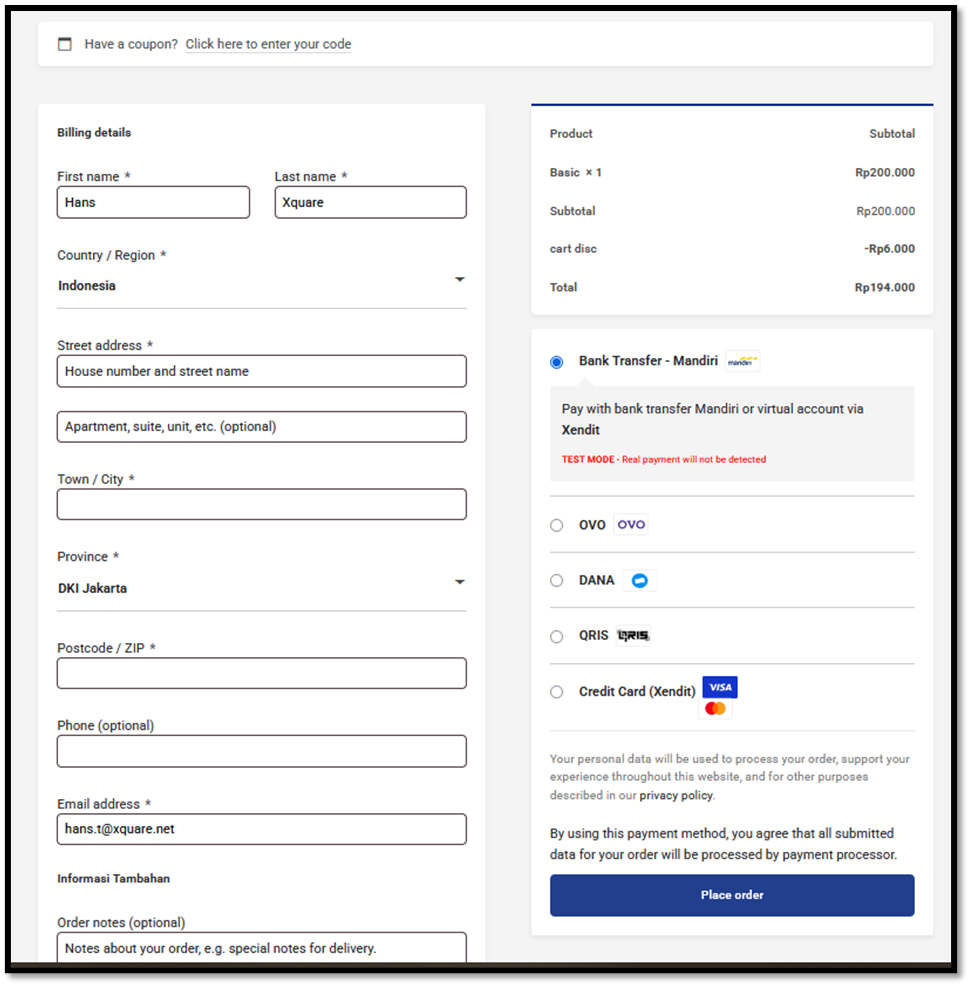
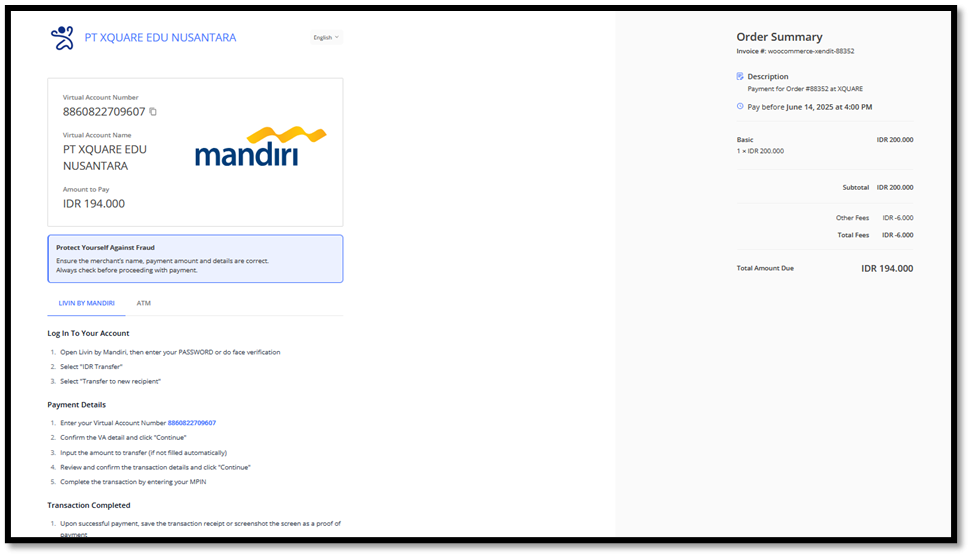
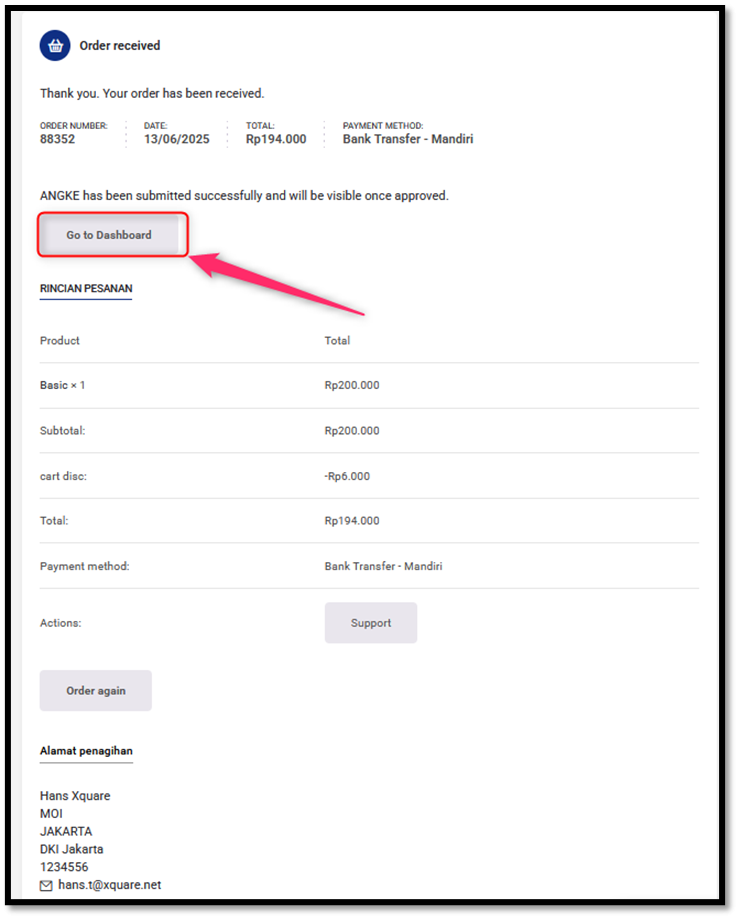
8. You Will Receive Your Payment Details (As Shown in the Image)
After completing the payment, the system will display your payment details, order received automatically, as illustrated in the image. You can view and manage your listing by clicking the “Go to Dashboard” button
9. Our Team Will Review Your Listing
After you submit your listing, our team will conduct a review process. During this period, the status of your listing will be marked as “Pending Approval”, as shown in the image. Once approved, your listing will be automatically published and the status will change to “Published”. Make sure all the information provided is complete and accurate to help expedite the approval process.